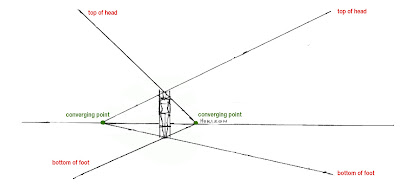
I like this diagram because it is one of the clearest examples Loomis has in this book showing how to determine the heights of multiple figures in one composition.
1. As always when drawing in perspective, first determine the horizon line/eye line.
2. For demonstration purposes, I'm going to use the background figure as the model for the remaining figures. Follow the steps in Addendum 1 to make the flat diagram/map.
3. Draw lines from the top of head and the bottom of the feet of the original figure to converging points on the horizon line. Then extend those lines to where you want the next figures to be placed. These guide lines will maintain the proportions of the various figures.
NOTE: The Flat Diagram boxes of the three foreground figures have vanishing points that extend off the page.
AND if you DO like these posts, become a follower by clicking on the "Follow" button on the right. Thanks!


thank you
ReplyDelete